Showing posts with label recipe-Dessert. Show all posts

Tuesday, September 25, 2012

A Pinterest Party

First off, let me just say that life has once again been crazy, busy...but can I just also say that LIFE IS GOOD!

Last Sunday was Art Day at my house again and it was another fun, fun day!  Whenever us girls get together, we always have too much lots of food.  This time around, we decided to all make a new recipe from Pinterest.  Well...I guess we were all a little excited about it because I don't think any one of us did just one recipe!  We had LOTS of food and all ate until we were stuffed!  It was sooo good, though!

Then, as if that wasn't good enough, we also decided to make a recipe card (6x6 size) of our new creation to put in our ever-growing recipe books we've made.  Here are the two I made.  They are both super-duper-easy recipes to create.  Trust me, they were simple-but that just makes them all the better, right??  (and as always, click on the photos to enlarge them)
Now, if you know me at all, you also know I like to go with a theme of some sort.  Well, Pinterest to the rescue again.  I went with a Halloween theme.  Just check out the table legs...
 Whatdya think??

If you haven't checked out Pinterest yet, I suggest you do...unless you have no time, because it will suck you in and you may not come up for air anytime soon!  It is an online board chock-full of ideas for just about anything you can imagine.  You just "pin" your favorites and can come back to look at them later.  If you are already on Pinterest, just click on my link in the left column to follow me there.

Happy Scrappin'


Monday, September 3, 2012

Fall Favorites

Can you believe the summer is over and fall is here?  I know I sure can't!  My nieces (along with all of your kids, I'm sure) will be back in school tomorrow.  I am ready for all the games, but I am not ready for summer to be over!
With all those changes also comes a new Stamp of the Month, Fall Favorites.  It really was a favorite of mine.  I was lucky enough to get to create the artwork for our little group using this fun set.  I used the new Clementine paper pack along with our new alcohol markers.  These new little babies are great!  I have never been one to like coloring in my stamped images, but now with these new markers, it is fun and easy (I really can't believe I just said that!)

Take a look at the artwork I created...
Contact me this month if you are interested in getting this stamp set for yourself.  Once September is gone, so is this great set.

Happy Scrappin'

Thursday, July 12, 2012

More summer fun

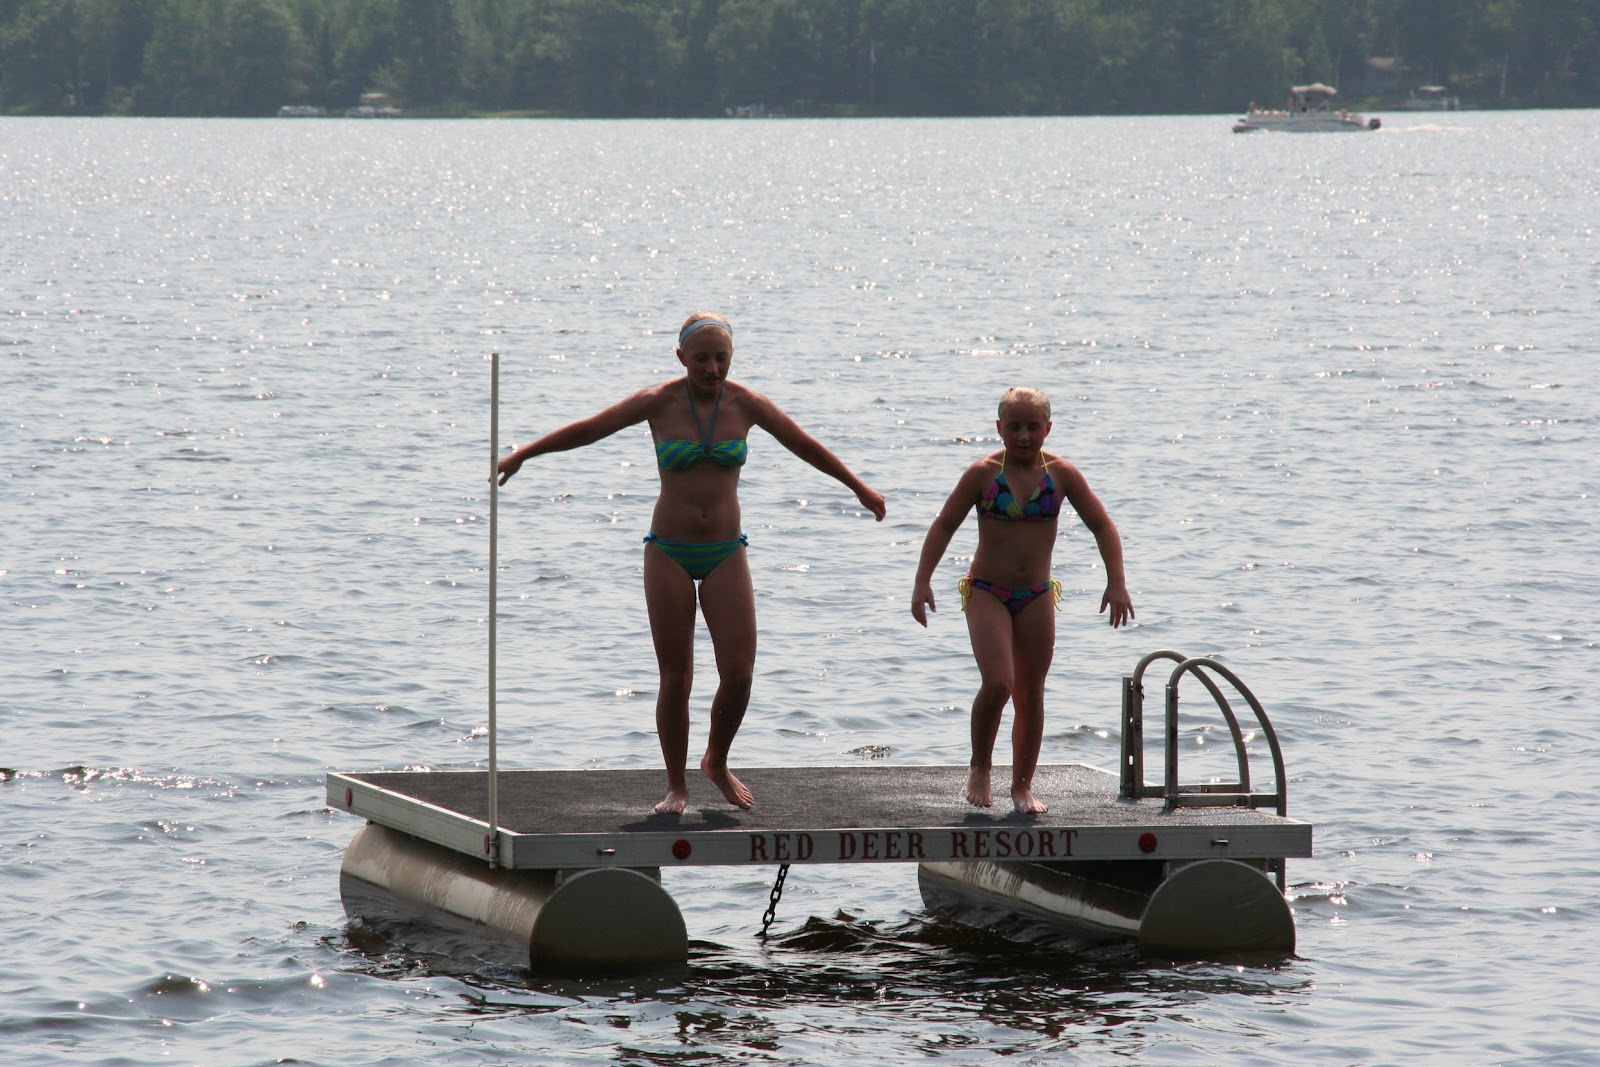
The weekend before the 4th was also spent with my family at the lake.  What a beautiful day it was (although quite HOT).  Yes, I said HOT!  We had over a week of very hot and humid weather (and yes, I do still live in Wisconsin!)  Our weather was hotter here than down south even!

Anyway, here are a few pictures of our fun...
Here are a couple more recipes for you, too.  The first is for S'more Bites.  They were so easy to make and much neater to eat than the originals.  Just as good, minus the campfire.
7  whole graham crackers (1 cup finely crushed)
1/4 cup powdered sugar
6 tablespoons butter, melted
4 bars (1.55 oz each) milk chocolate candy, divided
12 large marshmallows
 
Preheat oven to 350 degrees F. Place graham crackers into a large resealable plastic bag. Finely crush into crumbs. Combine graham cracker crumbs, powdered sugar, and butter in a small bowl.
Place 1 tablespoon of crumb mixture in each cup of a mini muffin pan. Firmly press crumbs to form shallow cups. Bake 4-5 minutes or until edges are bubbling. (I discovered how easy it was to form the shells by using my cookie scoop - 1 scoopful was just the right amount and the back of the scoop worked well to press them into the tin).
Meanwhile, break two of the candy bars into rectangles. Remove pan from oven; place one rectangle into each cup.
 Cut marshmallows in half crosswise using shears dipped in cold water. Place one marshmallow half, cut-side down, into each cup. Return to oven 1-2 minutes or until marshmallows are slightly softened. Remove pans from oven to cooling rack; cool 15 minutes. Carefully remove cups from pan. Cool completely.

Break remaining candy bars and place in small microwavable bowl. Microwave on high 1 to 1 1/2 minutes or until melted and smooth, stirring every 20 seconds. Dip the top of each marshmallow in melted chocolate. Turn top-side up and let stand 40 to 60 minutes or until set. Makes 24 cups.
The next recipe is for Sand Pudding.  You've heard of Dirt Cake?  Well, same idea only it looks like sand instead of dirt.

1 pkg Vanilla Wafers
3 or 4 Oreos
8 oz Cream Cheese
1/4 C Butter
2/3 C powdered sugar
2 small pkgs French Vanilla pudding mix
2 3/4 C Milk
12 oz Cool Whip

Crush Oreos and Vanilla Wafers in a food processor.  In a separate bowl, cream together softened 8 oz cream cheese, butter, and powdered sugar. In another bowl, mix pudding with milk.  Add to cream cheese mixture.  Fold in cool whip.  Layer into buckets with sand, pudding, sand etc. 
 
I found both of these recipes on Pinterest...imagine that!
 
Happy Scrappin'
 

Wednesday, July 11, 2012

4th of July

As you are reading this, I am on my way to Dallas, Texas for our Close To My Heart Annual Convention.  I can hardly wait to spend time with all my "sistas" and to learn, learn, learn.  I will have lots of fun new stuff for you when I get back!!
I hope everyone had a great 4th of July.  It is a bittersweet holiday for me as the 5th marked 3 years since my daughter passed away.  I refuse to let it get me down, though.  I had a wonderful day with my family.  My 3 nieces mean the world to me and I couldn't love them any more than if they were my own!
We made a trip up north to visit Grant and Lori at the campground (and play in the pool) and then headed even further north to visit with Mom and Norm.  We missed out on the big picnic, but got to relax and visit a little anyway :)
 Isn't my Mom the crafty one?  She had these firecrackers all over!
Mr. Eagle even came to visit us :)
I made some Rice Krispie bars to bring along and I thought I'd share the recipe with you.  I know, I know...you're thinking, (what in the world, have I never made them before, don't you think I know how?)  Well, let me tell you, these are better than your average Krispie bars.  There is a little addition to them that just makes them all the better.  You may never go back to plain old Krispie bars again!
3 Tbsp. butter
1 10 oz. bag mini marshmallows
1/3 cup yellow cake mix (dry, not mixed into a batter)
6 cups Rice Krispie cereal
1 (1.75 oz.) container sprinkles

Melt butter in a large saucepan over low heat and add marshmallows. Stir until they begin to melt, adding in (dry) cake mix one spoonful at a time so its combined. Stir in cereal so it is completely coated with marshmallow mixture. Sprinkle in half of the sprinkles and mix. Press into a baking dish (any size will do) and top with remaining sprinkles. Let sit for about 30 minutes before cutting.

I told you, they're good :)

Happy Scrappin'


Sunday, June 17, 2012

Rhubarb Muffins

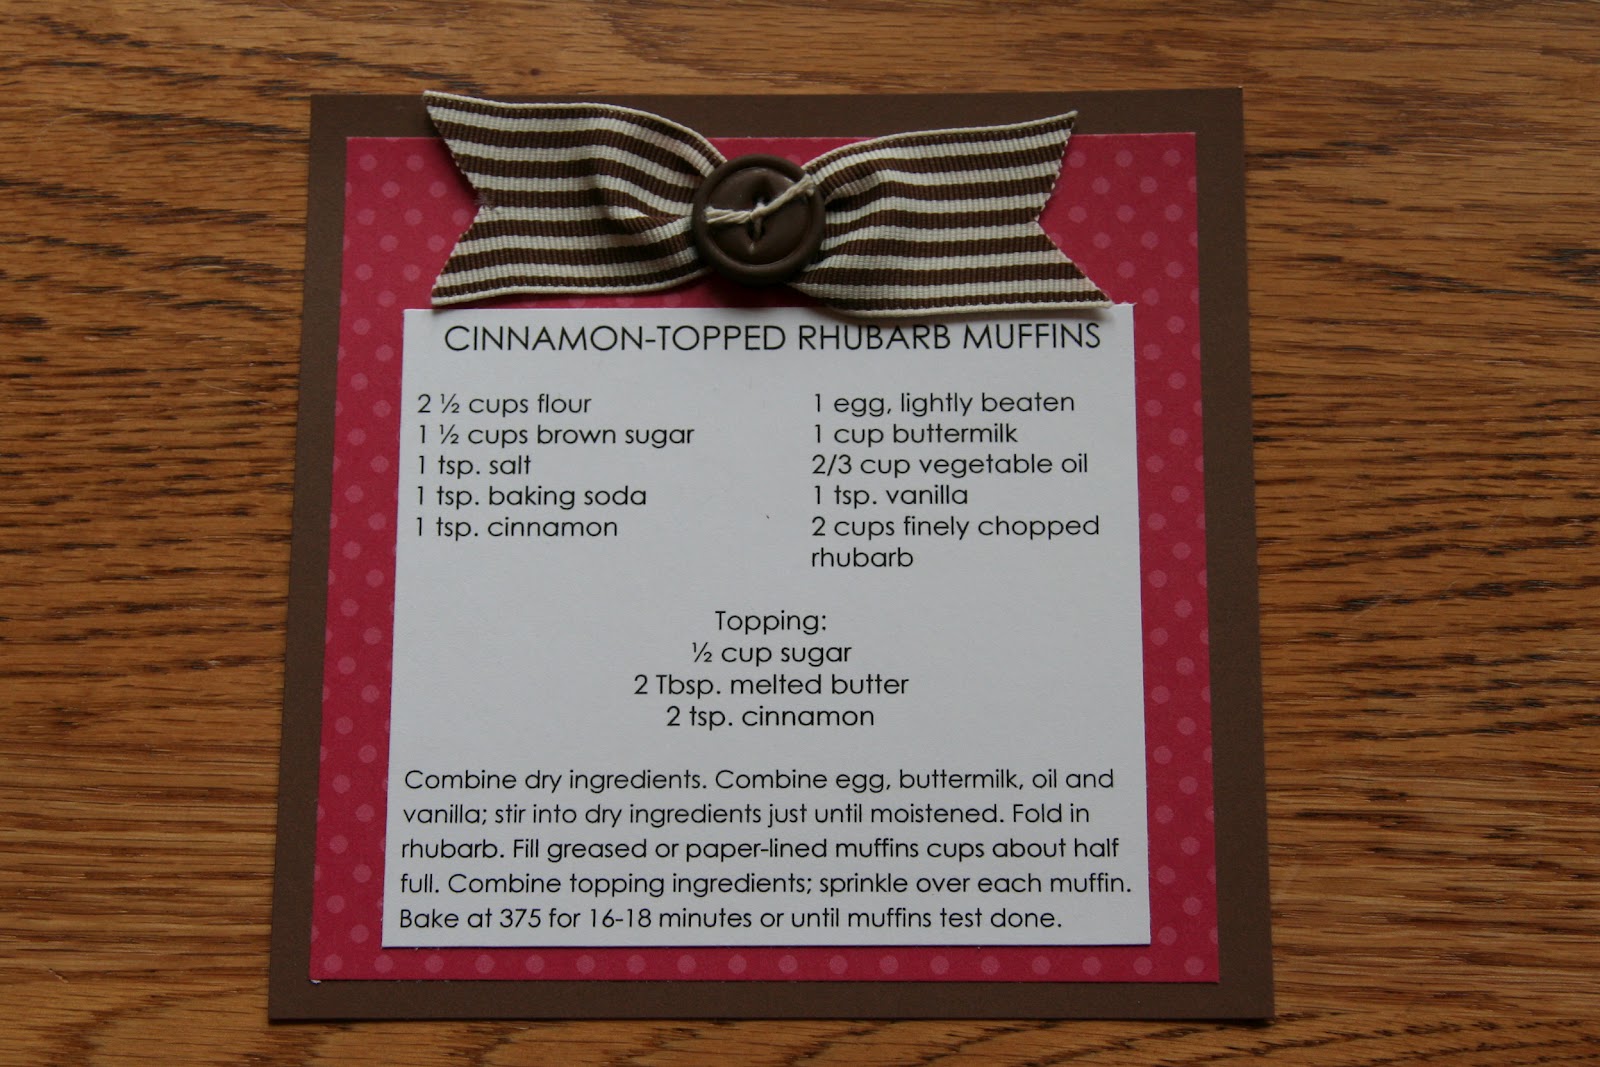
Today brings you another recipe card I made.  Not only did the card turn out cute, but the muffins were great!  Just look at the adorable muffin cup liners I found at Ikea a few weeks back on a fun day with my friend Lynn :)
Remember, you can always click on the photo to see it larger (so you can read the recipe!)
 Happy Scrappin'

Friday, May 25, 2012

Sheri's Swap Recipes

Today I bring you Sheri's Recipe Swaps.  They both sound so yummy :)
 Happy Scrappin'
Sunday, December 18, 2011

Ugly sweaters and cookies

Today's post brings you some UGLY sweaters!  The girls from work all got together for a cookie exchange and decided to wear our ugly Christmas sweaters, too!  I had a hard time finding one as I got rid of all of mine, brought them all to Goodwill, a long time ago.  I ended up buying one at Walmart.  As I checked out, the clerk asked if I needed a gift receipt.  After answering that I did not, she asked if I was treating myself!?!  I started laughing and said that I was buying it to wear to an ugly sweater party.  She must have liked it much more than I did as she didn't find the humor in it!  Oh well, I truly remember wearing these things years ago.  If only I'd have known, I could have kept them and had a good use for them now.  LOL!

Here is the invitation I made for the girls.  The only problem with it is that after I gave them out, I won tickets to Disney On Ice in the Andersen Suite at the Xcel Energy Center.  Kinzie and I had a great time there last week :)  The girls and I just postponed our cookie exchange for a week.  All is good in the world.
Here we are in all our ugly sweater glory.  Aren't we adorable?  Really, we don't even look that bad!
Barb was our big winner so she won the prize - a snowman in an ugly sweater!
Take a look at some of the treats we had.  Yeah, this was just a small sampling of our goodies.  We all went away with a lot of baked goods.
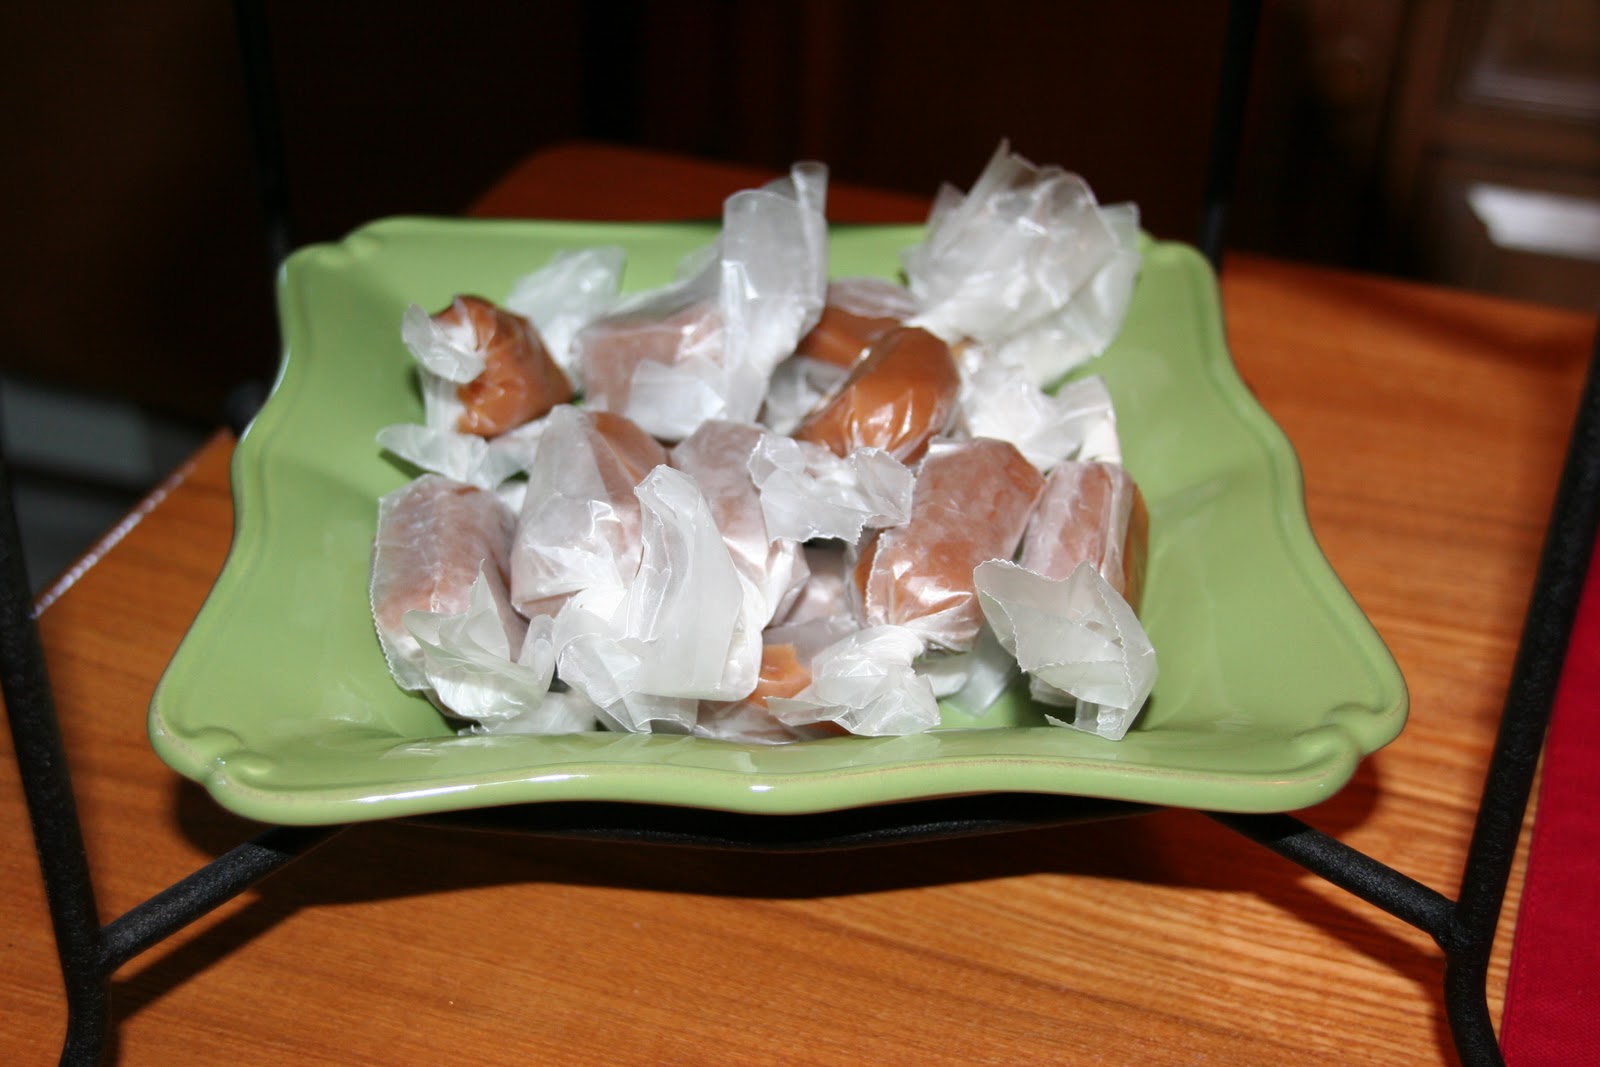
I made the homemade caramels you can see on the left side of the photo.  They are soooo yummy!  I will even give you the recipe here.  Thanks go out to "Gator" at work for sharing his wife's recipe.  They turned out great :)
Butter Caramels

2 1/4 cups brown sugar
1 can sweetened condensed milk
1/2 pound butter
1 cup light corn syrup
1 tsp. vanilla

In a heavy saucepot, cook butter, sugar, milk, and corn syrup until it reaches 245-250 degrees (approximately 13 minutes).  Remove from heat and add vanilla.  Pour into a buttered 9x13 pan.  Let cool and cut into strips then into 1" pieces.  Wrap each piece in wax paper.

**I did double the recipe and put it in a jelly roll pan and it worked great :)

Happy Scrappin'

Wednesday, December 7, 2011

Baked Caramel French Toast

Today's post brings you a yummy, yummy recipe.  It's so sinful, but worth every last bite!

I found a recipe while blog surfing a few weeks ago that sounded delish.  Well, after making it, I was not impressed.  I was hopeful for it, though, so I found another recipe and kind of combined the two.  The result is pure perfection.

I made this Baked Caramel French Toast at the retreat for the rest of the girls.  Everyone agreed, it was a winner :)  *The photo really does not do justice, trust me, it's very tasty!
Here is my version of the recipe:

Topping:
1 cup brown sugar
1 stick butter
1/3 cup milk
1 Tbsp. corn syrup

French Toast:
4 eggs
2/3 cup milk
1 tsp. vanilla
1/4 tsp. salt
1/2 tsp. cinnamon
6-8 slices french bread (however many will fit in your pan)

Combine topping ingredients and cook over medium heat until smooth.  Pour into greased 9x13 glass pan.

Beat rest of ingredients  Dip both sides of french bread into mixture and place slices over topping in pan.  **Now, when I made this, the egg mixture is enough for about 2 pans so either double the topping ingredients and make 2 pans or cut the egg mixture in half - it's up to you :)

Cover and refrigerate overnight.  In the morning, bake uncovered at 400 for 20-25 minutes.  Take out of oven and let stand for 5 minutes.  Invert over a large serving tray.

*You could also add some pecans to the topping mixture (maybe after you invert it onto the tray??)

Enjoy and Happy Scrappin'

Sunday, October 30, 2011

Halloween Cupcakes

I guess I've been in a candy corn sort of mood this year.  Along with making another batch of my Candy Corn Cookies, I decided to make some Halloweeny cupcakes today, too!  Same idea, just with a cupcake...
They look pretty normal - until you cut into them (normally I would have just bit into it, but figured for a photo, I would cut it in half instead!  You're welcome!)  Doesn't it kind of remind you of a piece of candy corn?
Happy Scrappin'

Tuesday, October 25, 2011

Candy Corn

Halloween just would not be complete without candy corn.  I love it mixed with dry roasted peanuts - it tastes just like a Salted Nut Roll candy bar :)

While I was blog surfing, I can across these adorable cookies (did you notice them in yesterday's picture of the goodies on our table?)  They were just calling out to me, so of course I had to make them.  You can just use your favorite sugar cookie recipe for this (I won't type all of that out for you here, but if you want it, feel free to let me know as I certainly can do that for you :)
Once you have your sugar cookie dough made (or I guess you could really use the pre-made stuff from the store if that's what you desire) then just divide it into 3.  One you are just going to leave plain, one you will color yellow and the last one you'll color orange - you probably could have figured that much out yourself, huh?  Then, line a loaf pan (not too big) with Saran Wrap.  Then pat the white dough into the pan.  Get it all nice and patted down evenly.  Then layer the orange dough on top of that and get it all patted down.  Last, do the same with the yellow dough.  Each layer should be about 3/4 of an inch thick - roughly, no need to measure, it just all depends upon how big you want your cookies to be.  Refrigerate your dough (at least 1/2 to 1 hour but I left mine overnight as it was too late to finish them the other night).

Remove from frig and lift dough out of pan (see, I told you to line your pan with Saran Wrap - not only does it make it easier to pat it down, but easier to lift out).  Slice the dough into about 1/4" slices.  Then you are going to cut your triangle shapes as shown in the picture. Half of your candy corn pieces are going to be white on the bottom instead of the top, but if I hadn't told you that, you probably wouldn't have even noticed.
Put your candy corn shapes on a cookie sheet and sprinkle with sugar (the sugar is not necessary, but since they will not be frosted, I thought it might add a nice touch.  I just wish I would have had some of that fancy decorator sugar as it would have made them more sparkly.)  Also, since you will not be frosting these cookies, I added extra almond extract to my dough when I mixed it up just to add a little extra flavor.  Then bake cookies according to your recipe.
Done, easy, and oh so cute!
Speaking of candy corn, remember me telling you about my niece Kiana and her Cricut skills?  Well, she came home with me the other night and wanted to make another project.  We were very limited in our time, so this is what she created.  Isn't it adorable?  And it only took her a few minutes!  She was not into the picture-taking mood the other night, though, so no photo with her :)  I thought she was going to take it home with her, but the little stinker said, "I made it for you!"  What a sweetheart - she even wrote a little message on the back for me :)

Happy Scrappin'